
Proper installation is important for getting the best fit, appearance, and performance from your Resilite FLEX3 Wall Padding. This guide walks through the complete installation process, including standard wall sections, molding, inside and outside corners, and outlet covers.
For additional guidance, we recommend following along with the FLEX3 Wall Padding installation video while completing your installation.
Before You Get Started
Before beginning your FLEX3 Wall Padding installation, gather the appropriate safety equipment, tools, and installation materials.
Recommended Safety Equipment
- Gloves
- Safety goggles
- Earplugs
What's Included With Your FLEX3 Wall Padding
Depending on your order, Resilite provides the following installation components:
- Adhesive-backed loop fastener tape
- Edge molding, if ordered
- Outside corner caps, if ordered
- Molding clips, if ordered
- Outlet moldings
Tools Needed:
Resilite provides the adhesive-backed loop fastener
tape for the installation of your FLEX3 wall padding. However, you will need to have the following tools and materials available to complete your installation:
-
Spray adhesive (Resilite recommends 3M Contact Cement 90)
-
Marker and white chalk
-
Laser, level, or framing square
-
Chalk line
-
Tape measure
-
Electric or cordless drill
-
Proper screws for wall substrate (optional, but mandatory for molding)
-
Circular saw
-
Sharp utility knife
-
Scissors
-
Cardboard
-
Broom
-
Drop cloth
If your installation includes molding, you will also need a hacksaw.
FLEX3 Wall Padding Installation
Step 1: Measure the Wall Padding
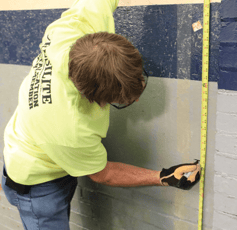
Measure both the height and length of your FLEX3 Wall Padding and determine where the top of the padding will sit on the wall.
Resilite recommends installing the padding flush with the floor. If the padding cannot be installed flush with the floor, it should never be installed more than 4 inches above the floor.
Step 2: Measure and Mark the Wall for Hook-and-Loop
Measure and mark the locations where the hook-and-loop strips will be installed.
Each strip is 2½ inches wide and will be installed both vertically and horizontally.
Vertical Chalk Line
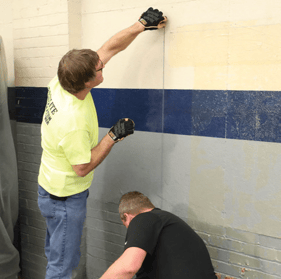
If your installation does not begin at an endpoint such as a door or corner, strike a plumb vertical line at the starting location.
This gives you a square reference point for beginning the installation.
Horizontal Chalk Lines
Hook-and-loop will attach to the wall at three locations:
- Top of the mat
- Middle of the mat
- Bottom of the mat
For the top line, measure the actual height of the foam and strike a chalk line 2½ inches below the height.
For the middle line, mark a line 1¼ inches above the center of the mat. This represents the top of the center hook-and-loop strip.
For the bottom line, strike a line 2½ inches from the floor.
Step 3: Measure and Cut the Molding
Vertical Edge Molding
The vertical edge molding should run the full length of the vertical chalk line created in Step 2.
Cut the molding to the required length using a hacksaw if necessary. Cut the edge cap to the same length.
Horizontal Edge Molding
Measure the length required along the top of the wall.
When the molding meets an inside corner, it should stop 2 inches short of each side of the corner.
Cut both the molding and its top cap to the appropriate length.
Step 4: Attach the Molding to the Wall
Vertical Molding
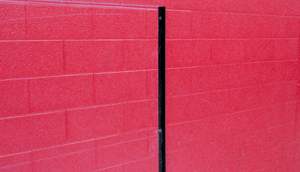
Strike another vertical chalk line 1½ inches in from the edge of where the mat ends.
Vertical molding should run between the bottom and top chalk lines at each edge and corner.
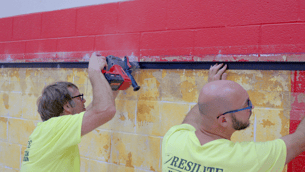
Attach the molding using the appropriate screws for your wall substrate. Fasteners should pass through the flat back of the molding.
When attaching molding to drywall, make sure the screws align with the wall studs.
Horizontal Molding
For the top molding, align the bottom of the molding with the top chalk line.
Step 5: Attach the Adhesive-Backed Fastener Tape
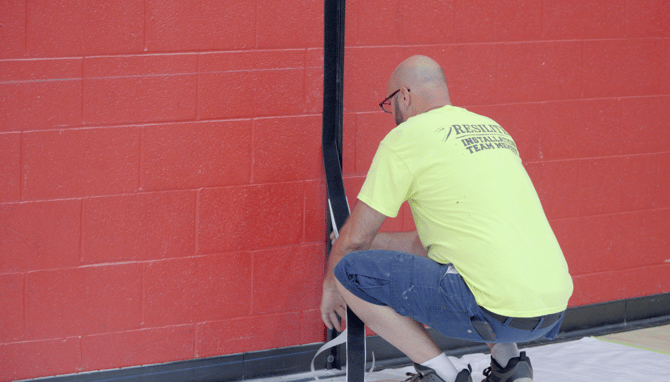
Install the vertical hook-and-loop strips first at the beginning of the padding location.
Attach one side of the hook-and-loop to the wall and align it with the chalk lines at the top and bottom of the installation area.
Installation Tip:
Be consistent about which side of the hook-and-loop system you attach to the wall. If you begin with the hook side, continue using the hook side on the wall throughout the entire installation.
Consistency will make aligning and attaching the wall padding easier later.
Step 6: Apply the Matching Hook-and-Loop
Attach the corresponding side of the hook-and-loop system to the strips already installed on the wall.
Leave the peel paper in place. It should remain on until immediately before the wall padding is applied.
Step 7: Prepare the Wall Padding
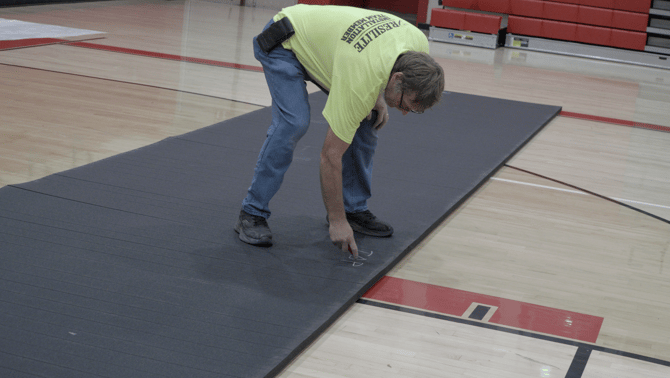
Place the wall padding with the back of the mat — the side with the slits — facing upward.
Use chalk to write "TOP" on the back of the padding so you can maintain the correct orientation during installation.
Next, strike chalk lines on the back of the padding using the exact same measurements used for the hook-and-loop lines on the wall.
Once marked, roll the wall padding and stand it upright with the top of the padding positioned at the top.
Important: Always follow the adhesive manufacturer's instructions regarding application, usage, and ventilation.
Step 8: Apply Adhesive to the Wall Padding
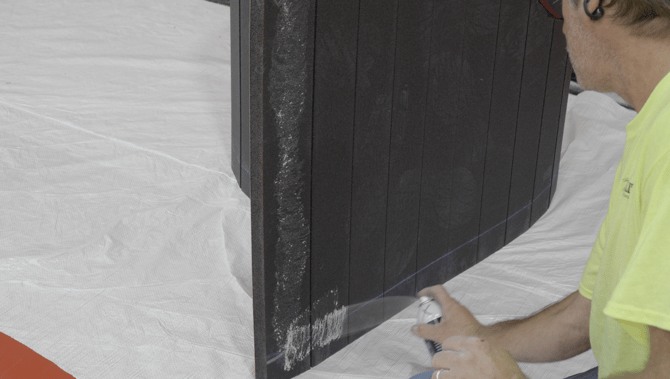
With the wall padding standing vertically, place it on protective plastic or a drop cloth at your starting edge.
Unroll approximately 2 feet of padding.
Spray adhesive along each of the chalk lines on the back of the padding and allow the adhesive to dry for approximately 5 minutes.
Step 9: Install the Wall Padding
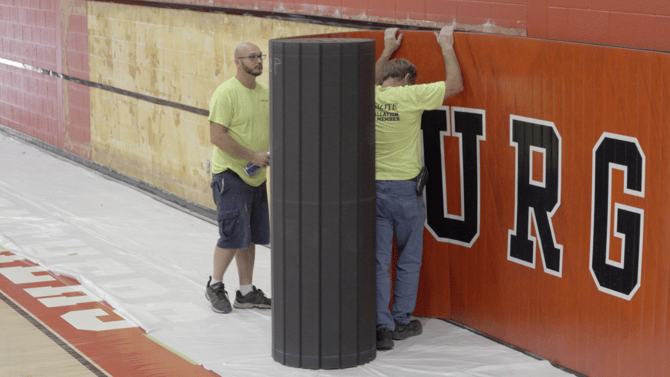
Carefully align the first section of padding with the hook-and-loop system.
Pay close attention to keeping the padding square on the wall.
Once the adhesive on the first approximately 2-foot section has dried, press the padding firmly against the wall and check the alignment again.
If the padding appears crooked, disengage it and reposition it until the correct alignment is achieved.
Continue repeating Steps 8 and 9 until the entire wall section has been installed.
Installation Tip: Firmly pressing or smacking the padding against the wall can help improve adhesive contact.
How to Install FLEX3 Wall Padding Around Outside Corners
Outside corners require additional preparation so the padding can wrap cleanly around the structure.
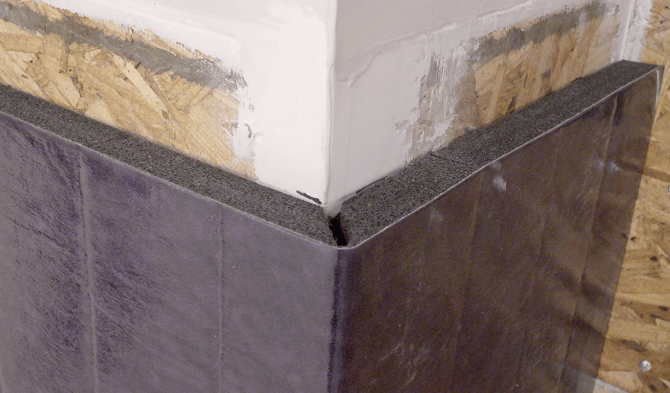
1. Complete the Framework
Before preparing the corner, make sure the hook-and-loop framework has been installed on all applicable walls.
2. Mark the Back of the Padding
Place the padding face down with the slit side facing up and mark the top.
L-Shaped Corner
Strike two vertical chalk lines.
Measure from the inside corner to the outside corner for the first line. Place the second line 2¾ inches beyond the first line.
U-Shaped Corner
A U-shaped corner requires five vertical chalk lines.
Measurements account for:
- Inside corner to outside corner
- An additional 2¾ inches
- Width of the column, including the thickness of the furring strip
- Another 2¾ inches
- Outside corner to the next inside corner
The fifth line identifies where the mat is cut to achieve the proper overall size.
3. Cut the Corner Channels
Measure the thickness of the foam.
Set the circular saw approximately ¼ inch deeper than the foam thickness and set the saw to approximately a 48-degree angle.
Cut along the appropriate chalk lines to create a "V" channel.
Do not cut completely through the mat.
If the physical corner is not square, the cutting angle may need to be adjusted.
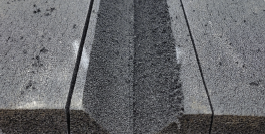
4. Clean and Attach the Padding
Use a clean broom to remove all foam debris created during cutting.
Apply spray adhesive along the marked lines. Allow the adhesive to set for approximately five minutes before attaching the wall padding to the hook-and-loop system.
How to Install FLEX3 Wall Padding at Inside Corners
Depending on your wall padding measurements, cutting may not always be necessary.
If a cut is required, two separate sections of wall padding will meet at the inside corner.
Strike a chalk line on the back of the padding at the exact corner location and cut completely through the mat along that line.
After cutting:
- Sweep away any loose foam.
- Apply spray adhesive to the applicable chalk lines.
- Allow the adhesive to set for approximately five minutes.
- Attach the padding to the hook-and-loop system on the wall.
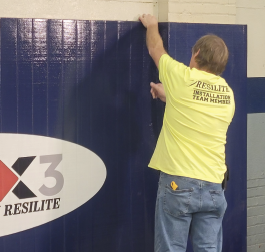
How to Install Wall Padding Around an Outlet
Step 1: Measure the Outlet Location
Measure the outlet's position on the wall and transfer those measurements to the padding.
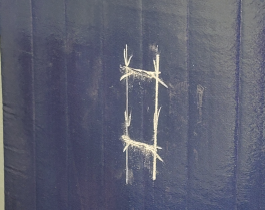
Step 2: Cut the Opening
Using a sharp utility knife, carefully cut along the dimensions marked on the padding.
Remove the cut section to expose the outlet.
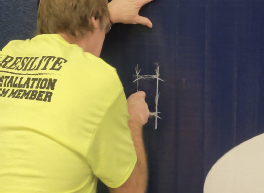
Step 3: Install the Outlet Molding
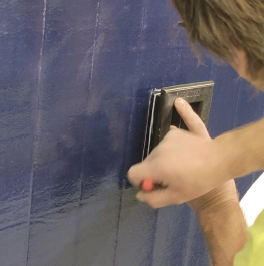
If your order includes outlet molding:
- Center the molding over the outlet.
- Trace the inner outside edges.
- Cut the padding as needed to accommodate the molding.
- Apply adhesive to both the back of the molding and the inside edges of the cut padding.
- Allow the adhesive to tack for a couple of minutes.
- Insert the outlet molding to complete the installation.
Finishing the Installation
After the wall padding has been installed, complete any optional molding.
If corner caps were purchased:
- Place the corner caps at each corner.
- Slide the edge molding into the grooves of the vertical edge cap and horizontal top cap.
- Push the molding down until it sits flush with the wall padding.
- Install molding clips at every corner cap and joint.
Once these steps are complete, your FLEX3 Wall Padding installation is finished.
Need Additional FLEX3 Wall Padding Installation Help?
For additional installation guidance, watch the installation video or contact the Resilite team with questions about your project.